Painted Bondaweb has been a favourite technique for many for almost as long as I can remember. I first saw it demonstrated about 30 ago (goodness, that’s a bit scary) but there are still occasions when nothing else will do. Another technique from about the same time is one that uses up scraps of threads, and I recently found myself returning to it to make some quick cards. I actually remembered to take some photographs, so I thought I’d share them with you to either bring back memories – or show you something new. It’s quickly started on the sewing machine.
You need:
A backing fabric (I used a space dyed one, but almost anything will do), hand threads of almost any description (maybe this is an ideal opportunity to use all those odd ends that you can’t bear to throw away), a chiffon scarf in a suitable colour, an embroidery hoop and a toning multicoloured machine embroidery thread

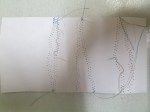
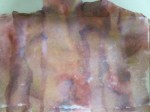
I’ve already started to prepare in the above picture. I’ve chopped up a mix of hand threads and scraps of machine embroidery thread. You can see them on my background fabric. A red chiffon seemed the best for this mix, but always audition several to make sure you are achieving the right effect.

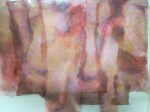
Spread the chopped bits out onto your backing. If it’s space dyed you can leave a few small gaps, but you will probably want to covei the whole area. Next cover with a single layer of chiffon and place into the embroidery hoop.
I dropped the feed dogs of my machine, set it for the widest zigzag but made sure that the stitch length was zero. It isn’t essential to use free machine stitching, you could always stitch a grid using ordinary straight stitch.
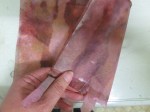
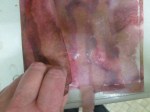
Stitch at random, moving the hoop fairly quickly. The idea is to secure the edge and the threads so that they don’t escape during the next step.
Once everything is safe you can remove the fabric from the hoop and trim it. I used a Madeira Polyneon, it’s ideal for something like this. This is just one of the colours available – and they are all yummy.

Now audition some hand threads
Mix and match. Your choice will change the character of the finished item.
Cover the surface with areas of stitching. French knots, seeding, little woven wheels, they are all good – and create very interesting effects
Add beads, cords, whatever takes your fancy. I can’t show you the finished item yet as it’s for a special card that’s still a secret. The technique, however, is suitable for a number of other items including little bags or book covers. Let me know if you give it a try – sometimes the ‘old’ techniques are worth remembering!